Thursday, February 24, 2011

Imperial Guard v Eldar - Batrep 2000pts


*No pictures this time guys! Sorry!

My List:

Company Cmd Sqd 5
Plasma Guns 4
Carapace Armor 1
Transport: Chimera 1

Platoon Command Squad 5
Flamer 4
Transport: Chimera 1
Heavy Flamer 1

Comissar 1

Infantry Squad 10
Grenade Launcher 1
Heavy: Autocannon 1

Infantry Squad 10
Grenade Launcher 1
Heavy: Autocannon 1

Veteran Squad 10
Plasma Guns 3
Transport: Chimera 1
Heavy Flamer 1

Veteran Squad 10
Meltagun 3
Transport: Chimera 1
Heavy Flamer 1

Veteran Squad 10
Meltagun 3
Transport: Chimera 1
Heavy Flamer 1

Veteran Squad 10
Meltagun 3
Valkyrie Assault Carrier 1
2 Multiple Rocket Pods 1

Vendetta Gunship 1

Vendetta Gunship 1

Leman Russ: Executioner 1

Manticore 1
Heavy Flamer 1

Hydra Flak Tank 3


His List from memory:
Eldrad 
Avatar
Shooty things that are good vs Vehicles
3x Wraithlords
Bikers with Shuriken Cannons
WS w/ CC specialist units
2x Deepstriking things (JPs) 

------------------------------------------------------------
-We roll Dawn of War and Annihilation
-He wins the roll to go first and I fail to seize

He deploys the Avatar at the 24" mark and the bike squad with craptons of Shuriken Canons
I deploy my Infantry Blob + CCS on the far right side of the table


His first turn:
All his stuff comes on the board pretty much dead center except the things deepstriking. I don't remember what the DS'ers were but they had some pretty nasty weapons if they could DS and shoot my rear. He shuffles his bikers a little but wants to remain out of LOS. Casts fortune on warlock squad Eldrad is with and nothing else is in range of fortune. Avatar moves 6" and runs 3" towards my troops.

My first turn:
Vendettas head up the center 6" along with the Valk moving 12". Valk deploys Meltavets as a screen so the Avatar has to charge them first. Plasma vets roll on 6" towards double tap range of the Avatar. Hydras roll in far left of my board along with the LRExecutioner and 3 Melta Chimeras for screening for them.

I decide for a good while whether or not I want to leave the CCS where they are at and order the infantry blob to shoot the Wave Serpent that just moved flat out with Bring it Down or move the infantry blob out of the way so my Plasma in the CCS can double tap range the Avatar. I decide to move the blob and sacrifice my shooting from the infantry squad blob. I move 12" towards the Avatar easily within double tap and deploy all my guys out of the vehicle.

Shooting phase I order my squad to "Bring it Down." I have both my Plasma Vets + CCS double tap the Avatar and it's left at one wound. My Meltavets that came out of my Valk double tap Lasguns in its face and do one wound which kills the Avatar because he failed the last save.

I fire almost everything at the bikers since they are the most mobile thing in his army and I don't want them getting close for side shots on anything. I bring them down to 3 left. I roll double 6's on the damage chart for my Hydras against his Wave Serpent and kill 3 CC specialists inside. Then I kill a Wraithlord with my Vendettas. 

Before he even takes LD tests for losing over 25% with his bikes he sais I win and gives up and starts packing up his things...


It's understandable that losing sucks but it's never fun for both parties if you just end it like that. No good hand shake, no talk about what could have been done better or anything. Just leaving your opponent at that without the satisfaction of letting them play it all the way out because their winning is not good sportsmanship nor does it make the person want to even play with you again. I spent more time packing my stuff up than I did deploying it out on the field and taking my turns...

I won but if my opponent was at least a little more sportsman like it would have been at least more fun. Was hardly fun at all. Please don't do this when you play against someone and your losing. Try to make the best of it, let them have their fun, and try to learn what you did wrong and figure out what you could do differently for next time.

Tuesday, February 1, 2011

Dark Angels - Yay for bandwagon?

So cutting to the chase, I'm starting a Dark Angels army.

Why? because now their good because of the recent FAQ changes.

Is that all? Nope :)

I'm a very new WH40k player, started in 5e about 8 months ago when my friends and I walked pass a display of Warhammer 40k models. When I was in middle school...10+ years ago, all of my friends picked up Warhammer 40k. My parents sadly did not want to pay for toy models for me to build and paint and I was never able to get into the hobby. Now I can! Yay job!

When my friends and I had passed by the display and they were all reminiscing about how fun 40k was I took the opportunity to try to convince everyone to play. They bought into it quiet easily actually and we all decided to start armies! The first model that ever caught my eye was a Dreadnought. I don't recall which army it was from but the model itself was just fantastic. I love robots and it was the closest thing to a mech warrior I could find! So I hoped on the GW site and looked through all the different models. My second favorite model out of all the armies was found. The Terminator!

I started doing research on different armies and found the Dark Angels eventually. They were fluffed up as a mix between Dreadnoughts and Terminators. My two favorite models in one army as the primary force? Yes please! However after much forum posting and asking for advice everywhere I turned shunned me away from the Dark Angels and I bought in. I should have stuck with it since they have my favorite models as their primary forces but I didn't and sadly went BA.

Now however I have sold my BA and am looking to start up a Dark Angels army. Termiantors, Bike Squads, Land Speeders and Dreadnoughts. BA was sold quiet a while ago hence I have not really been posting about them...on a more lucky happy note though my blog doesn't need to have it's name changed since "Angels and Aliens" still work for my two main armies Tyranids and Dark Angels! Hooray for coincidence! 

So with my models on their way (2 weeks probably...) I have started reading the codex front to back and building army lists for 1500 scalable to 2000.

With all that being said I shall leave you with my first drafted 1500 list. Enjoy!


Belial, DW Master 1
Dual Lightning Claws

DW Terminators 5
TH/ Storm Shield 4
Chainfist 1
Cyclone ML 1
Apothecary Upgrade 1
DW Company Banner 1

DW Terminators 5
TH/ Storm Shield 4
Chainfist 1
Cyclone ML 1

DW Terminators 5
TH/ Storm Shield 4
Chainfist 1
Cyclone ML 1

DW Terminators 5
TH/ Storm Shield 4
Chainfist 1
Cyclone ML 1

RW Land Speeder 1
Typhoon ML 1

RW Bike Squadron 3
Meltagun 2

RW Bike Squadron 3
Meltagun 2

Saturday, January 29, 2011

Tyranids - new 2k list

Here is my new 2k Nid's list. Explanations for units at bottom.


Tyranid Prime 1
Regeneration 1

Tervigon 1
Adrenal Glands 1
Poison Sacs 1
Catalyst 1

Hive Guard 2

Hive Guard 2

Doom of Malan'Tai 1
Transport: Spore 1

Tervigon 1
Adrenal Glands 1
Poison Sacs 1
Catalyst 1

Termagant Brood 10

Genestealers 20
Poison Sacs 20

Trygon 1
Adrenal Glands 1

Trygon 1
Adrenal Glands 1

Carnifex Brood  2
TL Devourers - set 1 2
TL Devourers - set 2 2


Ok here it is! The list I have been pondering over for a good while now. The people who play over at my FLGS have a bunch of marines. There is only 1 orc player and 1 Tau so a majority of what I go against will be MEQ. There are a couple vanilla marine players, 2 BA and 1 SW's. So this list is built around being an all comers list but still packing punch to some of my main threats.

HQ choices - Prime is there to pretty much give my backfield Synapse. It will probably join a HG group. It's just going to sit back with my HG and Carnifex's to shoot things down. The Tervigon is there to spawn some troop choices as well as be a front line Synapse creature. The troop choice Tervigon will serve a different purpose.

Elite choices - 2 of my slots will be filled with Hive Guard for obvious purposes. They destroy anything AV12 and lower so deserve those slots. I have been bouncing around an idea of making them 3 models strong per brood but I'm not sold on wasting that 100 pts. I don't think the return I will get will be much different from what I can get from 2.

Doom of Malantai is there in there because he's such a beast. He is awesome at doing what he does when he finally comes in and he draws fire most definitely. He almost always will come in with my enemys units on foot already. If he comes in and I haven't popped any transports and everything is still boxed up then I'm in trouble anyways. 

Troops - Been loving the 20 strong stealers w/ poison choice and they have yet to disappoint. Sadly last game I lost 12 just to an explosion so I know better now what NOT to do...I've been debating whether or not I should split them into 2x squads of 10 or keep them as 1x 20 strong Stealer squad. 20 has it's advantages but so does 2x squads. I've been having such great luck with 20 though that I'm not sure I want to even test out 2x 10.

Tervigon will provide my midfield with Synapse as I don't want to be as aggressively forward with a Troop choice Tervigon. The gaunts will be a bubble wrap and counter attack unit.

Heavy - 2x Trygons will be there for popping any AV14 that my opponent decides to bring and they will also draw a lot of fire away from my Tervigons + Stealers. If they don't draw fire then they will definitely tearing something up in CC very soon. Normally a turn 2 assault isn't so hard to accomplish. Turn 3 at the latest. One can give the other a cover save and they can swap back and forth until they are ready to assault. 

Carnifex brood of 2 are there primarily for anti MEQ and TEQ. This squad will statistically kill 2.5 Terminators from a squad of 5 a turn. It will also kill 5 out of 10 from a tactical squad. They also double up as a light transport killer as they have 44% chance to destroy a Rhino. Also they will be marching forward in front of my HG and Prime to get into CC as 8 (10 on the charge) str 9 attacks is nothing to scoff at. They are extremely expensive and will require Catalyst from one of my Tervigons to keep them alive and killing to really milk their value but they are also very versatile and great all around units. 

There ya have it! :)

Tuesday, January 25, 2011

Tyrannofex v Trygon

Howdy and good morning to everyone. Everyone knows Tyranids are lacking on ranged anti-AV13/14 weaponry. We've got great transport poppers, sadly taking up a very valuable Elite slot, but still great transport poppers in Hive Guard. However above AV12 we really have nothing to reliably pop transports from range. We do have broods of Zoanthropes but any Psychic Hood or Psychic protection is going to make the Zoans either kill themselves or render them useless...and most competitive lists that can take Psychic protection do.


Bring in the Tyrannofex.


The Tfex is known for it's rupture cannon. Str10 48" range 2 shots and AP4. Now this weapon is sadly fired at a BS3. There are many different arguments for the Tfex such as:

1) BS3 doesn't matter. Think of it as a twin-linked weapon that may have a chance to hit twice.

2) At a 2+ armor save this beast will be firing all game.

3) The option to fire at 48" range with S10 is amazing and can pop Nob Bikers and Thunderwolves.

The list goes on and on....


Sadly these reasons don't do it for me. Let me lay it out in an easy to read and assess format. But before I list my reasons why I prefer not to use the Tfex I want everyone to know this is just my opinions and reasoning behind it. I am not saying this is deadset and that no one should ever use the Tfex at all. I am also gauging my opinions on a Tfex that is primarily to be used as Anti-AV. The Tfex has great anti-infantry weaponry available but if I am taking a Tfex it's going to be for anti-AV. We have plenty of anti-infantry in everything else in our Codex.

--------------

Here is some mathammer before I list my points:

2x Tfex's shooting at AV14 with cover: (Double effects to get results without cover)
Shak : 13.182%
Stun : 8.077%
Weap : 8.077%
Immo : 8.077%
Wrec : 5.441%
Expl : 5.441%

2x Tfex's shooting at AV13 with cover: (Double effects to get results without cover)
Shak : 15.654%
Stun : 10.657%
Weap : 10.657%
Immo : 10.657%
Wrec : 8.077%
Expl : 8.077%

1x Trygons assaulting AV14 that moved 12":
Shak : 28.441%
Stun : 19.031%
Weap : 19.031%
Immo : 19.031%
Wrec : 13.941%
Expl : 13.941%

Calculation: (This calculation was done by Atnoslen from TyranidHive)
Destroyed Probability for 1 shot=(# of dice faces that hit)/6*(# of dice faces for Penetration)/6*(# of dice faces for destroyed result)/6

Thus for TFex with BS 3 hitting on 4+, penetrating on 5 & 6, and destroying on a 5 & 6: 3/6*2/6*2/6=5.56%

Binomial distribution for a success with 2 shots given probability of 5.56% = 10.80% chance to destroy in one turn.

Binomial distribution for a success with 6 shots over 3 turns given probability of 5.56% = 29.03%.

Compare to being in cover the entire time (3 turns): 15.55%

Over the game (5 turns), assuming the TFex lives, there is a 43.47% chance for 1 TFex to destroy an uncovered AR14, and only a 24.55% chance for a covered AR14.

--------------

-A smart opponent will usually ignore the Tfex: What? No smart player will ignore it! I have to say that the only player that won't ignore the Tfex is a player that doesn't know the chance that a Tfex actually has at destroying an AV14 vehicle. A smart opponent that knows the chance a Tfex has to impact a game is so low will ignore it and focus on more immediate threats right? Like that brood of infiltrated 20x Genestealers with Toxin Sacs. (Great suggestion by hyv3mynd that I've been using and having great success with! Here's his blog http://synaps3.blogspot.com/) 

If you have only fought opponents that constantly try to take down the Tfex then you will have good success with the Tfex because those shots aren't taking down your Tervigons or Flyrants or Harpys etc. Thus allowing them to get into the opponents face and smash it in. Now if you fight opponents that know to ignore your Tfex now you are truly set back because not only are you firing a 265 point model for 5 turns with only a 24.55% chance to destroy a covered AV14 vehicle and it's not doing it's intended job but now your other MC's are dying and not fulfilling their job.

-It's low chance of actually doing something to AV13/14: See math hammer above. Now remember we are talking about using the Tfex as anti AV13/14 primarily. Yes we know it has great anti-infantry shots but if your firing at AV13/14 then those shots are wasted.

-Cost: 265 points with a Rupture Cannon. That is a hefy amount of points to be put into a model with such a low capability of doing what it is taken to do. If it was priced around the Trygons points then I would be more acceptable of the Tfex.

-Talking about the Trygon, other great options. The Trygon will 90% of the time draw fire from your opponent leaving your other MC's capable of doing what they need to do. With that said a Trygon still has a fairly good chance at surviving considering FNP + Cover Saves. Yes it's tough to give a Trygon Cover saves but with Tervigons, Dakkafex's (or CC Fexs) or Venomthropes in the list and FNP it makes them much more survivable.

Let's mathammer some shots from 15 Missle Launchers per turn. 

Best case scenario is 4+ Cover Save and FNP: 34.7% chance to kill a Trygon
4+ Cover Save: 69.4% chance to kill a Trygon
5+ Cover Save and FNP: 46.3% chance to kill a Trygon
5+ Cover Save: 92.6% chance to kill a Trygon
Just with FNP: 69.4% chance to kill a Trygon.
Nothing: 138.9% chance to kill a Trygon. (LOL!)

So unless you take no precaution at all to you should have a fair chance to have the Trygon survive at least one round of shooting. Now your other MC's are still doing their job and alive. Or they ignore the Trygons and well...we all know what Trygons do when they are ignored. :)


Monday, December 27, 2010

[2500] Mech Assault BA - Prepping for 'Ard Boys

Yay a Blood Angels post! I've been playing Mech BA since I've picked up the Codex and I have to say, the way I've been playing at least has been getting boring and as I recently found out, quite ineffective.

My BA list usually copies the basic AV13 spam/Razorspam builds you find all over the internet. Razor Spam'd TL AsC, Baal Preds and Heavy Preds with Librarian Support. The thing you need to know about this type of list many people play is that it is very CC ineffective and plays very defensively. 5 man squads of RAS are wussy's. They die to anything in CC and are not even good as screens when you desperately need it. Basically you are using your fast movement to run around and kite your opponent while you gun him down in a hail of Las/ TL AsC and AC. I found with this llist losing a Razorback or a Predator of any kind was a huge stopping force to trying to win the game. Losing one effectively neuters a major portion of your shooting and the guys inside aren't even a big enough threat to draw fire away from my vehicles. If I lose 3-4 Razorbacks (which isn't uncommon in 1,500 or 1,750 pt games) I already know I am going to lose. My RAS are walking, Baals and Preds don't have enough fire power to win the games themselves. Your also effectively playing for a draw in objective games once your RB's are down since they lack mobility to get to an objective, lack numbers to be able to survive shooting when trying to hold the home objective and lack CC power to be able to take an objective guarded by enemy units.

Now yesterday I played my IG army (mostly proxied) vs a friend and found the play style very similar to what I was trying to achieve with my Blood Angels. Sit back and shoot. IG can lay the smack down with a possible 3x Strength 10, Ordnance Barrage, AP4, 120" shooting range Large Blasts. That is from one vehicle. This nullifies the need to deploy near the opponent like Blood Angels have to since their average range shooting is 24". IG can deploy tanks as far as they want and shoot across the board easily with a majority of their tanks. Not to mention their transports are AV12 and their Leman Russ are AV14.

This got me thinking.

What the heck am I doing with Blood Angels? I'm playing them as if they were an IG army. I decided to sit down and re-think my strategy and came up with these questions. What can I do to play to BA's strengths? What are the vehicle weapons best used for? BA's is great at CC with all the force multipliers they have in Chaplains and Sanguinary Priests. Then they have Terminators and a very nice Banner with their Honor Guard that can boost any CC capability by tremendous amounts with the bonus +1A. Their vehicle weapons are all mid-range shooting and thus should probably best serve the role as support to assaulting units, not my end game strategy.

Thus this list was born.

After much mulling around and tweaking I finally figured out a list that I was quite happy with. This list will make use of close combat as intended by the BA Codex and make use of the awesome weaponry provided by our vehicles to support the CC squads.

-The Librarian is there for his Shield since I still have quite a good amount of Mech to protect and his Blood Lance is just sexy AV poppers that support the CC units to get into the insides.
-Reclusiarch will run with the Assault Terminators to provide the reroll to hit and add to the killyness of the Terminators.
-Razorbacks for the TL Assault Cannon support to pop light vehicles and take objectives. One will use a Heavy Flamer to support infantry killing.
-There will be one 10 man Assault Squad flying behind the LR's and RB's. They can easily hide behind these vehicles. They will provide a counter punch to anything wanting to get close. With effectively 2 Sanguinary Priests they will have FNP and FC as well as the Banner effects. Very sexy squad to have and not to mention they are another fast scoring unit.
-Baal Predators, my favorite tank. One will be equipped with a Flamestorm Cannon and will scout up to an opponent and pop smoke. This will not only draw fire from my opponent but if it somehow survives it will be putting down the hurt on any MEQ or weaker. Devastator (Longfangs), Tactical Squad and Loota's assassin extrordinaire. The other will be a anti-infantry master and possibly position for side shots with its HL ML during it's scout move.
-MM Attack Bikes need no introduction. They stay behind LR's till they can get good positioning, move 12" and pop something valuable.
-Terminator Assault Squads will be wanting to get into CC asap and hence the LR:R. The LR will have a cover save via the close-by Libby and will get bonus' from Reclusiarch, Sanguinary Priest and Banner. Scary...
-Honor Guard are in an LR and the Libby will be with them to provide a wider Shield bonus. They will also be there to provide banner support, FNP/FC bubbles, assault fairly effectively but primarily pop whatever they feel like since they will be with 4 Meltas. These guys are a core piece to bringing this army together in CC.
-Finally I have a Furioso with Talons that drops in turn 1 and attempts to pop something with it's Melta or Flame some long range heavy support infantry. AV13? Check. Scary CC capabilities? Check. In opponents backfield turn 1? Check. The Furioso effectively adds another threat the opponent has to deal with that will be sitting near his backfield at the beginning of the game. Also you can play some tricky strategies with the Drop Pod like hindering a Land Raider or Battle Wagon's movement.


[2500] Mech Assault BA

Librarian 1
ShieldofS/ Blood Lance

Reclusiarch 1
Terminator Upg: C-Melta 1

Assault Squad 5
Meltagun 1
Transport: Razorback 1
TL Heavy Flamer 1

Assault Squad 5
Meltagun 1
Transport: Razorback 1
TL Assault Cannon 1

Assault Squad 5
Meltagun 1
Transport: Razorback 1
TL Assault Cannon 1

Assault Squad 10
Meltagun 2
Sgt: Power Fist 1

Baal Predator - Flamestorm 1

Baal Predator - TL AsC 1
Heavy Bolter/ HK ML 1

Attack Bike Squad 2
Multi-Melta 2

Terminator Assault-Squad  5
TH/SS Upgrade 3
Sanguinary Priest 1
Transport: LR:R 1
Multi-Melta 1
Extra Armor 1

Honour Guard 5
Meltagun 4
Chapter Banner 1
Transport: LR:R 1
Multi-Melta 1
Extra Armor 1

Furioso Dreadnought 1
Extra Armor 1
Heavy Flamer 1
Blood Talons 1
Transport: Drop Pod  1

Thursday, December 23, 2010

2,250 Batrep - Nids vs Orcs Mekkan

My list:

Tyranid Prime 1
Lash Whip/ Bonesword 1
Toxin Sacs 1
Hive Guard 3
Hive Guard 3
Venomthropes 2
Tervigon 1
Adrenal Glands 1
Poison Sacs 1
Catalyst 1
Termagant Brood 15
Tervigon 1
Adrenal Glands 1
Poison Sacs 1
Catalyst 1
Termagant Brood 14
Genestealers 20
Broodlord Upgrade 1
Implant Attack 1
Scything Talons 1
Carnifex Brood 2
TL Devourers - set 1 2
Trygon 1
Adrenal Glands 1
Tyrannofex 1
Rupture Cannon 1


Orc List:
Here is about what he had. Not 100% sure on what was everywhere but this is what I remember he used.
3x 3 Killer Kanz
1 group of 3 Buggys
2x Big Meks
3x 28-30 Shoota Boys
2x 5 Lootas
1x group of 15 infiltrators with the infiltrating guy

-----------------

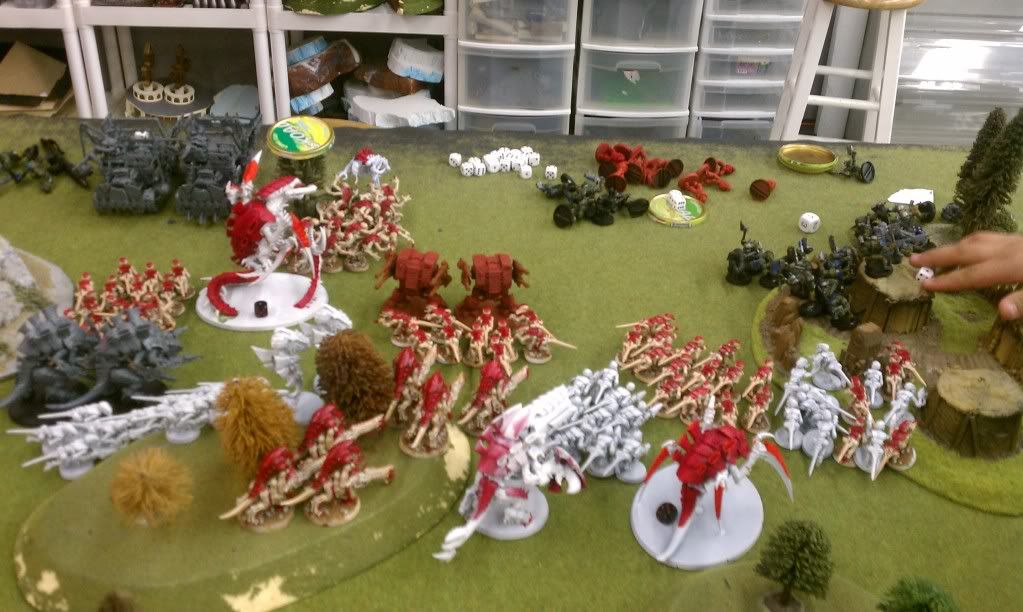
We roll, I deploy and I go first.
He fails to seize.

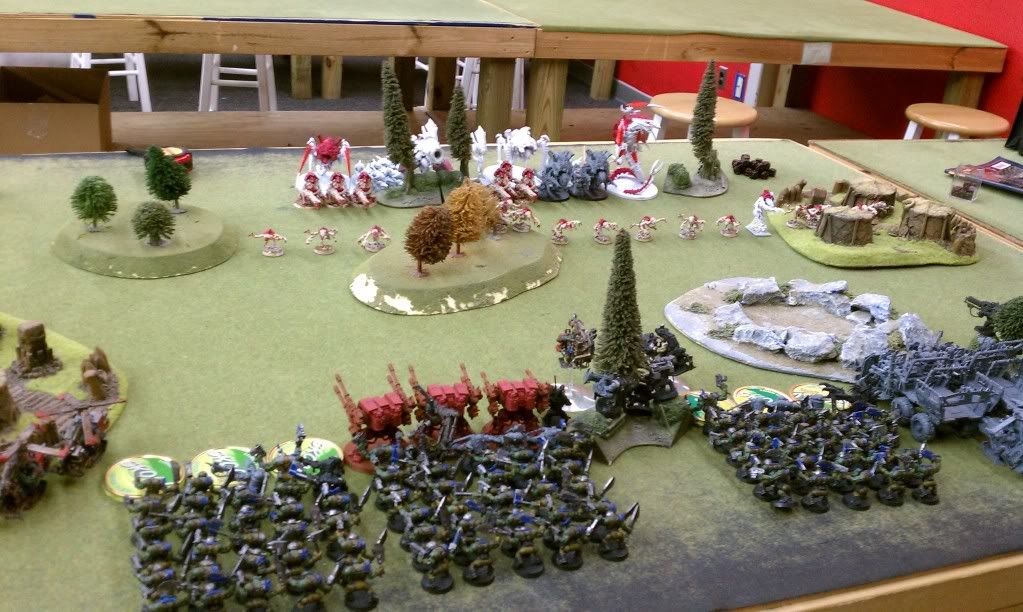
This is how I deploy. I make sure my synapse is all tight and everything is close knit. Centrally deploy for an aggressive hard to counter-deploy move. Not really thinking much on cover saves as I was deploying but more thinking of how I can more successfully stack everything in to get shooting first turn. Also string Stealers along for area denial of his scout moving Deff Koptaz.


He deploys in the typical KillerKan formation with the Kanz blocking assault to the Shoota Boys in the back.


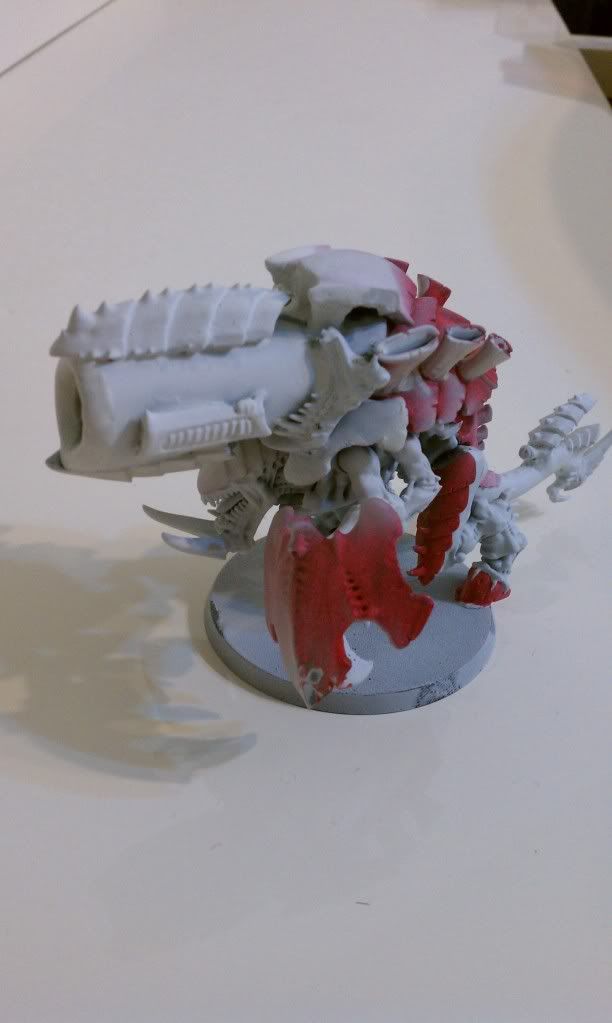
*Note there aren't very much pictures of the turns. Sorry I'll make sure to remember to take more next time. Was kind of in a rush of excitement to try out my newly converted Tyrannofex and new list and kind of forgot >_>*

My turn 1:
I move everything up and birth 15 and 14 bare Gants with my Tervi mommies without rolling doubles. I get Catalyst off on my Stealers and a Hive Guard squad. Everything else goes shooting or runs. My main focus for shooting was the Killer Kanz and Kopters. The Kopters are armed with the powerfist and will make my Tervigons cry so I try to focus them down. After all my shooting at his Kopters that turbo-boosted during their scout phase I killed 1. Luckily he failed his LD and ran off the board. I kill 1 squad of Lootas and destroy 1 Killer Kan. I've never played against a list like this before nor do I play against Orc normally so I did not know his Buggies were in a squad together...Otherwise I think the right decision would have been to shoot at them instead. Their Rokkits are also TL! >_< Oops.

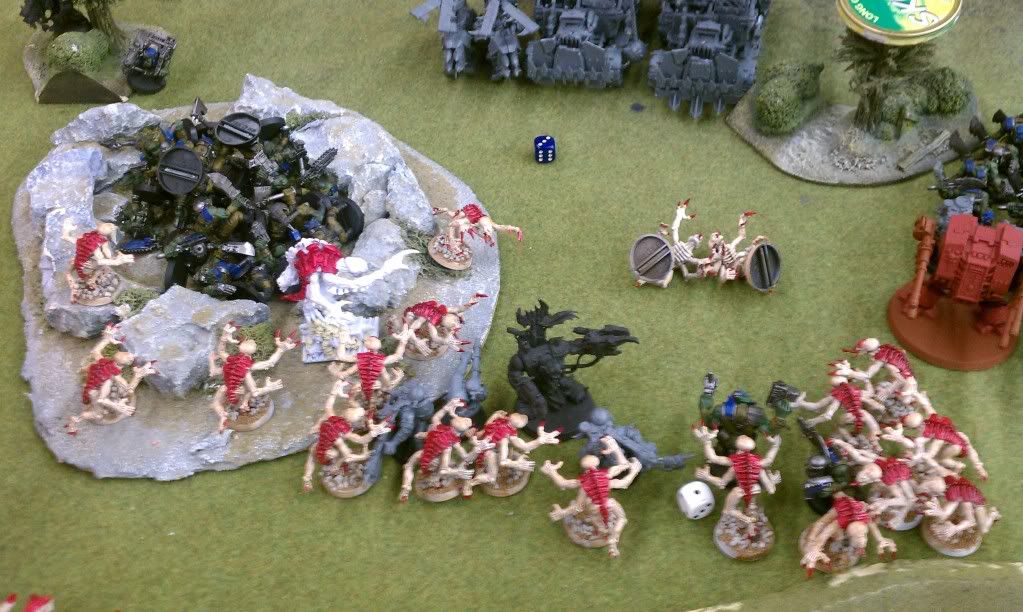
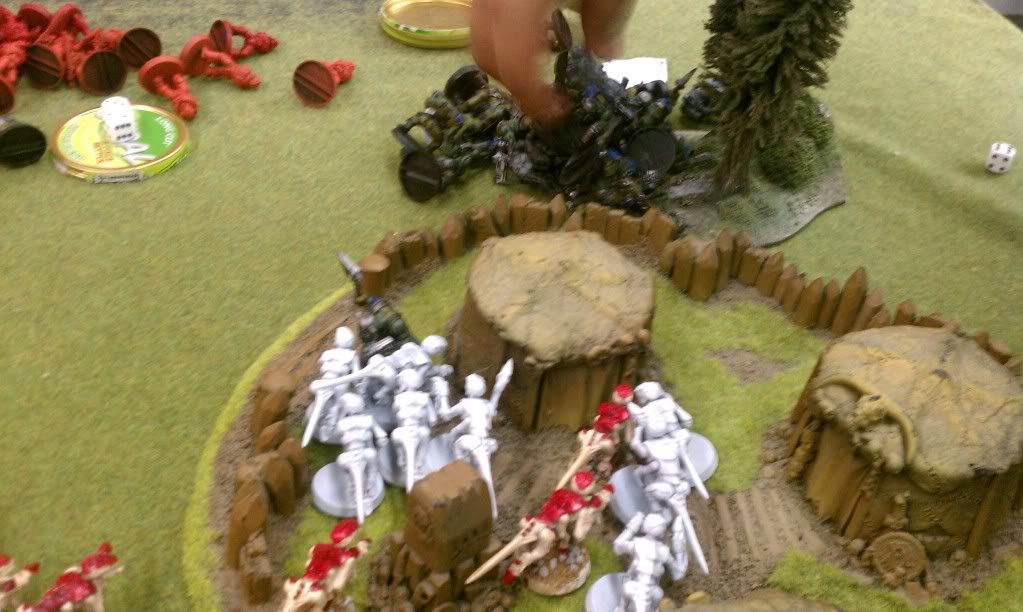
Oh, as a highlight of this phase here is my shots on his Lootas :)


His turn 1: 
He moves some Kanz out of the way and puts his squad with a Big Mek in front of my Stealers. Easily within charging range. This is where I really messed up badly and forgot to string out my Stealers to my Veneomthropes >_< He almost kills my Tervigon on his left with the Buggies being the MVP of the round putting 2 on the Tervigon. Most everything else shoots at the Tervigon as well and brings it down to 2 wounds left. My Stealers lose 1 body from shooting. My Trygon also takes 1 wound. I'm so scared of Rokkits...

Assault phase happens and it is a crushing victory for my side. High I win it for the Stealers. They kill an insanely large amount of Orcs and wipe the remaining Orcs + Mekk off the table with a sweep. It was a mistake on his part to do this but he learned and now he knows how scary Stealers can be in CC.


My turn 2:
Move up again with everything that can. Run up with my Stealers and surround the middle group of Orc Boys with the remaining Mekk. Every single thing I have that can hurt a KK shoots at those KK in the center. I get a destroyed result on one of them...That's 12x Impaler Cannon shots, 1x Rupture Canons and even 24x TL Devourers. Ouch >_< I also shoot up and kill 1 more Kopta on his left. 

My Trygon assaults the Buggies that moved 6+ but he get's rerolls and I score 3 pens! I get a 6, 2,1 which becomes a 6,3,2. I take off the Rokkit off one of them of course and the other suffers a 2 so I can say the Buggies have safely been neutered. Genestealers form up around the destroyed KK in the center and assault as many shoota boys as they can. Luckily with move 6 and run, I got a 4, I was able to get all into combat. Wiped everything out again extremely easily. Genestealers really show they are to be feared in CC! They consolidate but can't make into cover. 


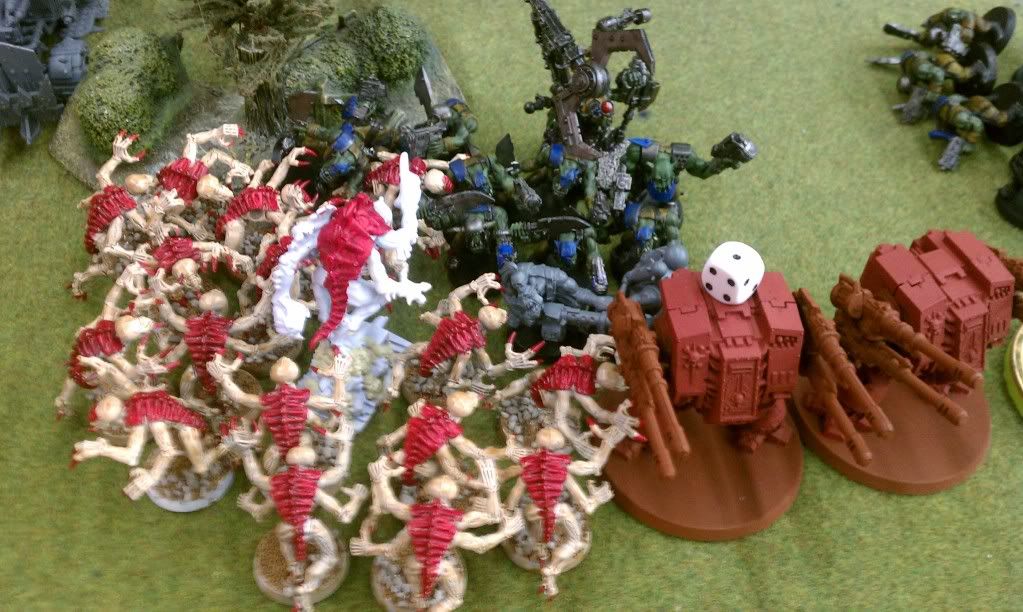
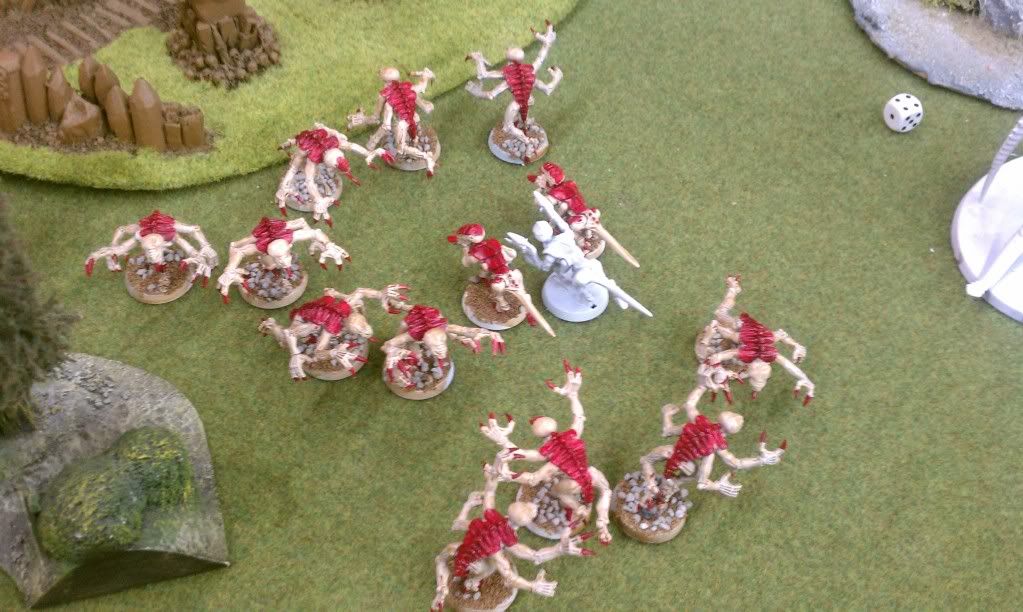
I assault the group of 2x KK with a brood of 15 Termagants to tie them up from shooting at my low W Tervigon next turn. He kills 2 and I can't do anything at all to his armor 11. (The ones I assault are those 2 red ones in the picture)

His turn 2:
He moves his last squad of Shoota Boys into cover since Nids lack Assault Grenades mostly and his Outflanking guys with the guy who lets them come from any table edge comes in. The Outflankers move in towards the Genestealers that I forgot to Catalyst...He runs his 3x KK back out of "tie-up" range. He puts another wound on the Tervigon through shooting so it's down to 1 last wound. I also lose 2 Stealers to shooting. (No FNP and no cover)

Outflankers and the lone KK (KK's are proxied as those little bottle tops) assault the Genestealers. Genestealers win with only their special Outflanking guy (Grot Snigg??sp??) left. He does 5 wounds and I save 3, 2 die. His KK kills 1 more. 

2x KKs tied up with my Termagants whiff and my Termagants flail around.


My turn 3:
Everything moves up and the Trygon runs to help the helpless Termagants against the KK's. My Tervigon on my right side Spawns 15 Termagants again without clogging up! Move newly spawned Termagants + Old spawned Termagants + Devilgants up to lay waste to the Orcs in cover.

Shooting the group of 3x KK's that moved back his last turn with my HG finally brings good results. They've been whiffing all game! I destroy 2 and the last one gets a 2 and 3 result. All my Gants on the right side shoot at the Orcs in cover. I take out about half and then they prepare for assault. (The Gants on the far right of the picture got FNP from the Tervigon)

I assault the 2x KK in the center with my Trygon and destroy both to free my Gants. Genestealers destroy the CC weapon on the KK, thanks Rending. Gants with the FNP roll to assault and they make it! Other Gants fail to assault. Orcs go first and they kill 2 Gants and my Gants fight back fiercely and wipe them with the blessings of the Tervigon! :)


Victorious Termagants!


His turn 3:
Stealers whiff vs last KK with no arm and it whiffs vs me.

My turn 4:
Trygon runs for the final KK. Carnifex's run to aid the Stealers. HG destroy all the buggies, Trygon annihilates the KK and Carnifex's kill their KK 5 times over.

Victory shot!

My total casualties. They will be recreated by the Hive Mind!


Conclusion:
Overall it was a very fun match for both of us. We both used some models we haven't used before and it was both of our first games over 2,000 points. We discussed for a good half hour about our mistakes like how he should not have assault such a deadly force of Stealers and how I should have strung out guys to my Venomthropes. (I forgot to put them closer up so my Stealers get the Defensive Grenade and difficult terrain gifts.) There was more discussion but I'm getting really tired and I'll leave that for possibly another day...

The Tyrannofex was awesome when he fired his templates but was mildly to highly mildy disappointing. I believe he is better replaced as another Trygon or the anti-infantry version of the Tyrannofex. Carnifex's were awesome most of the time and Hive Guard showed up at the end. One thing I was surprised at was I spawned nothing lower than 13 Gants whenever I did the Tervigons power and I also never rolled doubles! At the end of the game I couldn't spawn anymore because I ran out of my 75 Termagant pool...Stealers were great and pushed his scouting Koptas back from getting close to my Tervigons. A great strategy of area denial. Also he might have been able to assault my Tervigon on his first turn but I had bubble-wrapped it with the first group of newly spawned Gants. 

Great game! Thanks Pete! 

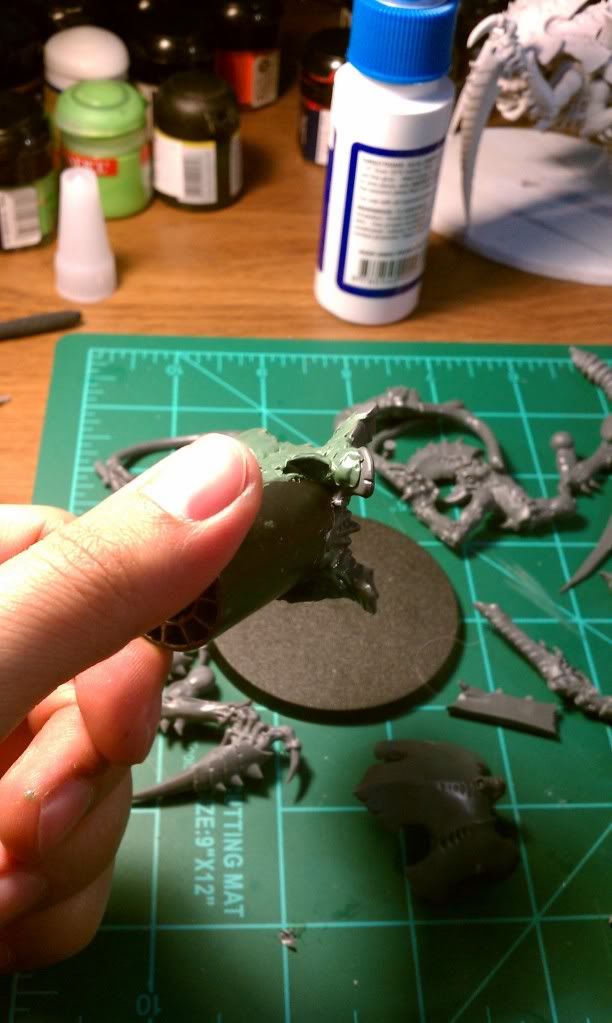
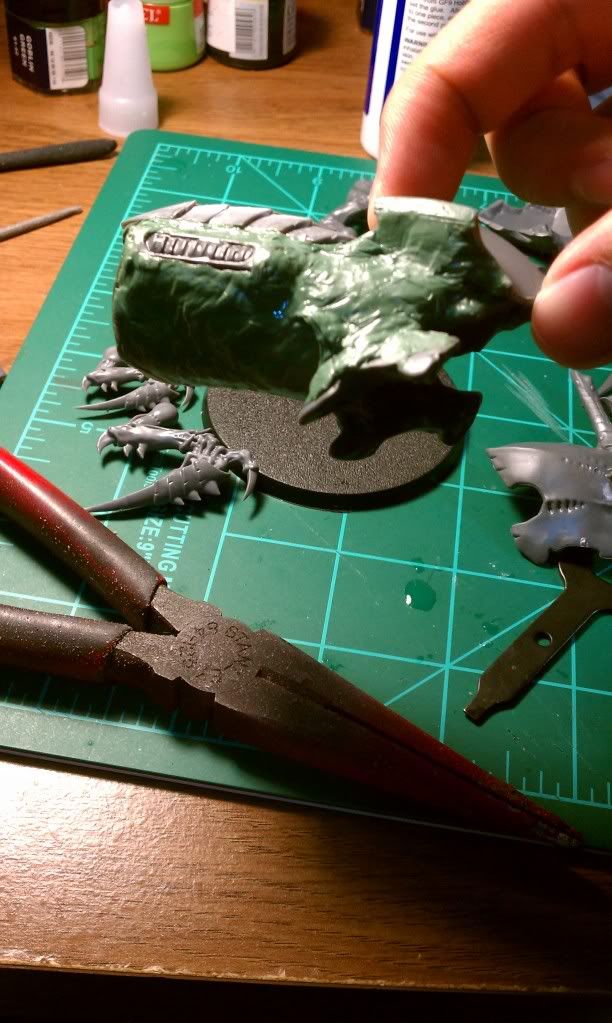
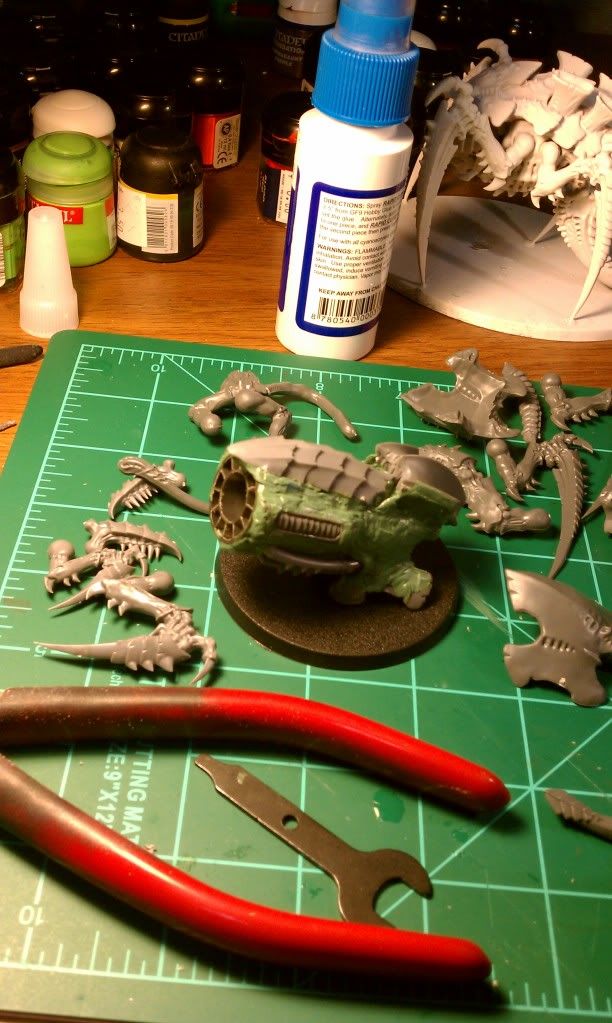
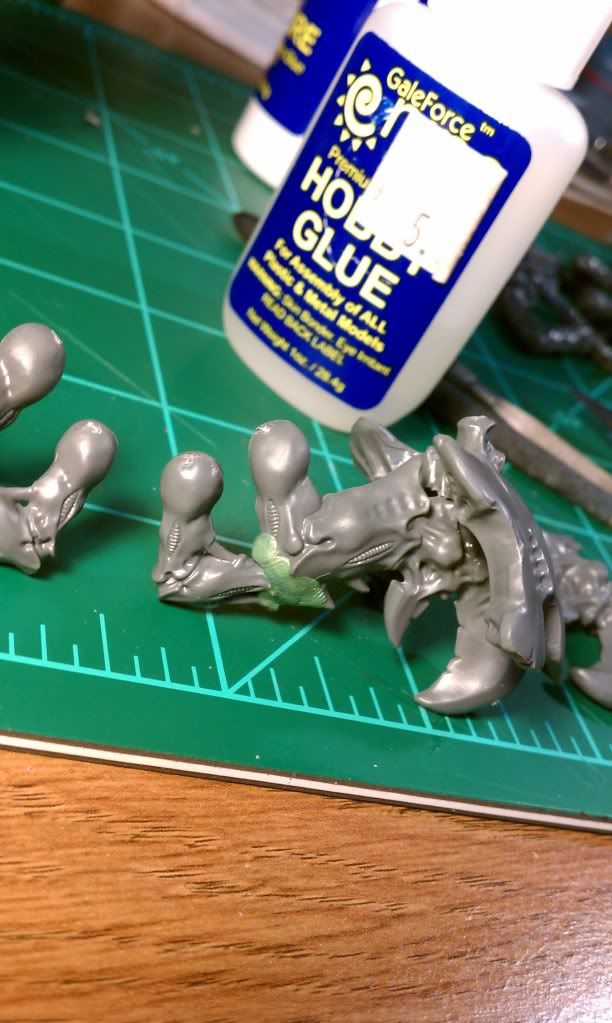
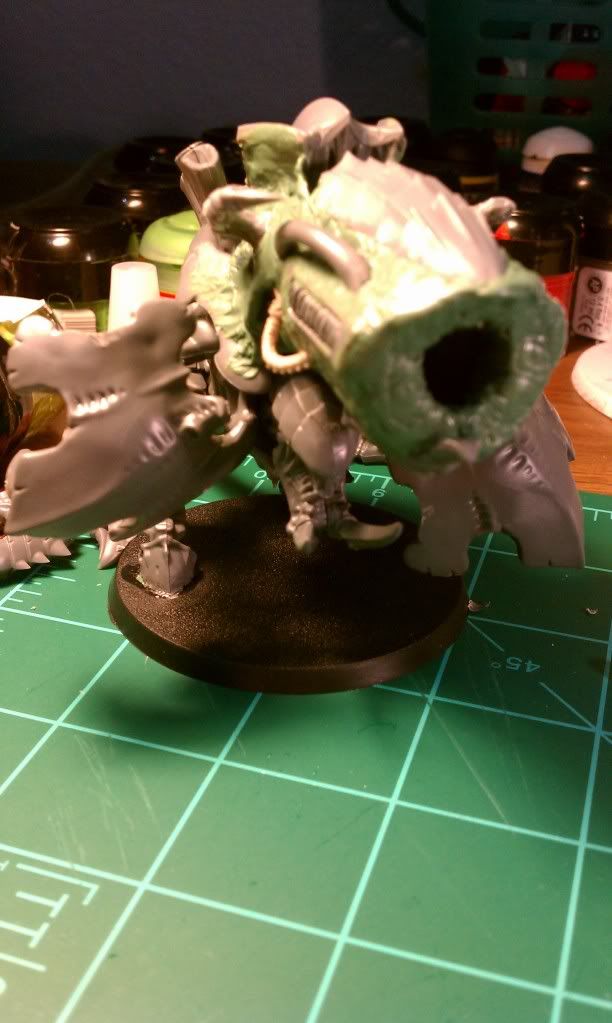
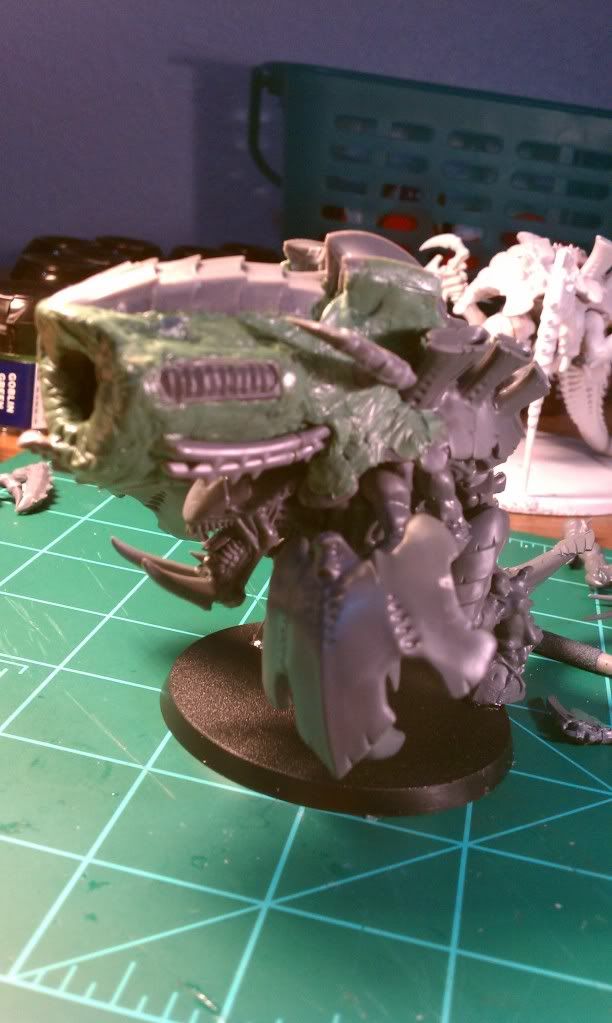
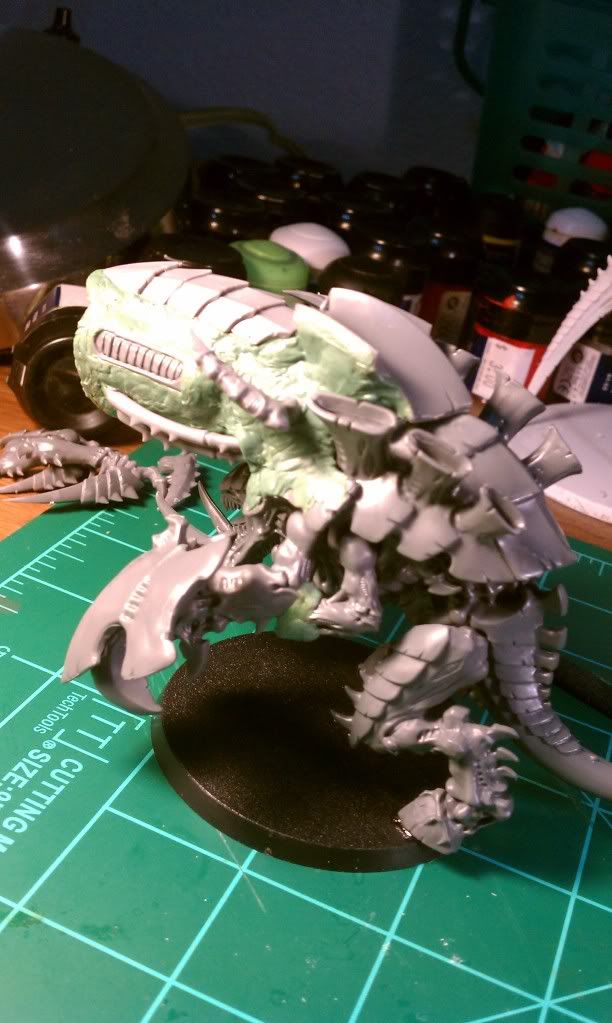
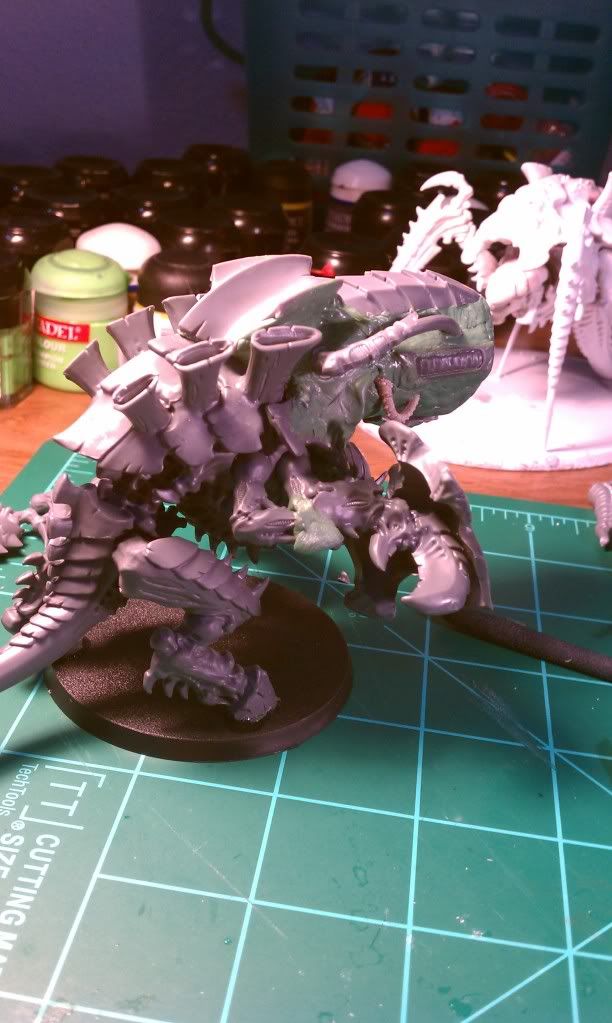
Here are some pictures of my modified Tyrannofex before I take off. I ripped up my old one from my tutorial and made his gun better and smoother. 

Good gaming and good night!


Sunday, December 19, 2010

Tyrannofex Conversion

Hello and welcome to my Tyrannofex Conversion tutorial!

I don't claim that this is the best Tyrannofex conversion above the rest. If I say I do not like other Tyrannofex conversions it's simply a matter of personal taste. With that said this Tyrannofex does not follow the image in the Tyranid Codex so if that's what your looking for I apologize. I just want to give a tutorial after all my hard work because I haven't been able to find a T-Fex to my liking. Maybe this will help someone. This Tyrannofex is built from my own ideas of how I see a BS3, T6, W6 and 2+ save model. I am NOT claiming this is a completely one of a kind Tyrannofex conversion as I'm sure it will resemble some models out there. Only so little we can do with Carnifex kit bashing into a Tyrannofex :)

This Tyrannofex conversion is going to be modeled with a Rupture cannon mounted on his back. I see the T-Fex as a very tanky almost Riot Shield wielding Tyranid. I do not want a T-Fex with scything talons as I see his talons snapping in half after the force of firing a Rupture Cannon @ Str10. I wanted my T-Fex to be bulky and tough. After looking through a bunch of leftover bits I finally found the "bulk" and "riot-shield-esque" ideas I wanted to do and decided to finally give it a go!


Step1:
You need an empty Cash Register paper roll. You then need to carve and cut at it until it can fit on one of those Carapace that you put on a Carnifex smoothly. Assemble the Carnifex Body, Tail, and Legs standard.


Step 2:
Glue the form fitted Register Roll to a Carapace piece you'll eventually glue to the top of the Carnifex.


Step 3:
I'm going to combine a bunch of steps into step 3 since they are all the same thing. This step is where we start making the barrel look like more than a Register Roll. Start finding bits from other guns, claws, trygon jaws, extra trygon bits etc. and put them on the roll. You will cover the entire Rupture cannon with green stuff. Then  just start squishing the pieces into the green stuff.


Step 4:
Now glue the Carapace holding the now "be-dazzled" rupture cannon to the Carnifex body like you normally would. :P If you want it more of a barrage look then put green stuff under the Carapace holding the Rupture cannon first so it raises it. I like it straight since it isn't a barrage-ish type weapon.


Step 5:
Don't have a picture for this step but attach the head. Do not use the Carnifex head with antennaes. It pokes the rupture cannon. I used the one where he has the two spikey boney things coming out of his chin.

Step 6:
Get 2 arms that are holding something. Make sure they are different. A left and right arm that you can convert. I also had a buttload of extra Carapace bits so my riot-shield tank-ish looking Tyrannofex dreams were coming true! Collect them. Also get the Crushing Claws that comes with the Carnifex kit.


Step 7:
Cut the spikes off that come out of the crushing claws.


Step 8:
Cut the arms that have a left and right side you had earlier like the picture below and "link" them to the Crushing Claws arms with green stuff. I don't know how to specifically explain it but the pictures should be able to get you a good idea of what to do.


Step 9:
Glue the Carapace onto the Crushing Claws so the pointy part is facing downwards. I like to think of these as the T-Fex's "Armored Shell" biomorph! Also I placed them pointy side down because when the Tyrannofex fires his massive Rupture Cannon he shoves his arms into the group to act like a brace from the impact while still shielding his body kind of like a riot shield. Another fun note, is it covers almost everything except his face giving him awesome protection but limiting his view, hence BS3 instead of BS4. ROFL


Step 10:
Now glue the Crushing Claw/Carapace Shield to his body and your done! Here are some completed pictures. Hope you enjoyed the tutorial and good luck if you try it! :)